
There is something deeply satisfying about stepping into your backyard and snipping basil you grew yourself. A well-built garden bed does more than hold soil. It frames possibility. It turns a patch of grass into a destination. And when designed thoughtfully, a DIY Raised Garden Bed becomes a long-term investment in both beauty and bounty.
For home-centric creators who see their spaces as extensions of their personality, building a DIY Raised Garden Bed is not just a weekend project. It is a way to shape daily rituals, gather friends around summer salads, and bring intention to the outdoors. The good news is that with the right materials and approach, you can build one that will look beautiful and perform beautifully for years.
Let’s dig in.
Why Choose a DIY Raised Garden Bed?
Before we talk lumber and screws, it helps to understand why raised beds have become a staple in modern home gardens.
Better Soil, Better Results
When you build a DIY Raised Garden Bed, you control the soil from day one. Instead of battling compacted or nutrient-poor ground, you create a rich growing environment tailored to vegetables, herbs, or flowers. This leads to healthier plants and more generous harvests.
Improved Drainage and Fewer Weeds
Elevated beds drain more efficiently, which protects roots from rot. They also create a clear boundary between cultivated soil and surrounding lawn, reducing weed creep and making maintenance far easier.
Aesthetic Appeal
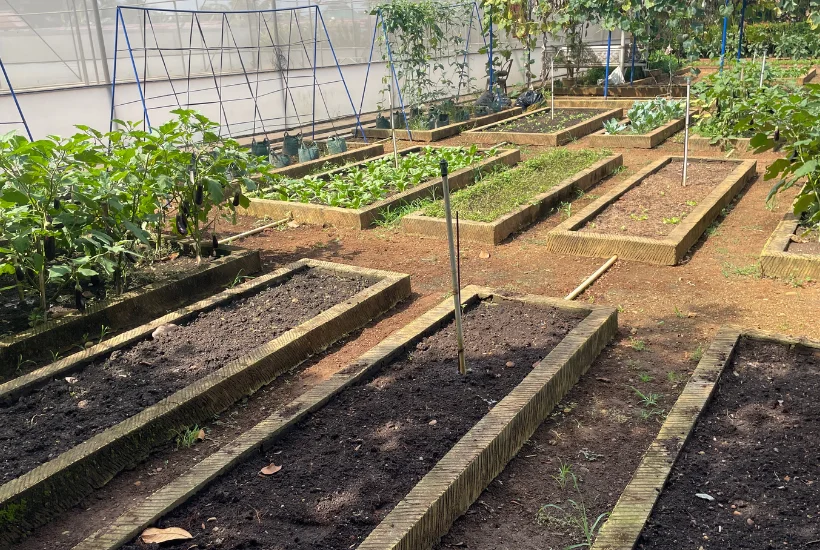
Raised beds introduce structure and rhythm to a yard. They can echo the lines of your home or patio and instantly make a space feel curated. Whether you lean toward rustic farmhouse or clean-lined contemporary, a DIY Raised Garden Bed adapts beautifully.
Planning Your DIY Raised Garden Bed
The secret to longevity is thoughtful planning. A bed that lasts ten years begins with smart decisions before the first board is cut.
Choosing the Right Location
Look for a spot that receives at least six to eight hours of sunlight daily if you plan to grow vegetables. Observe how water moves across your yard after heavy rain. Avoid low areas that collect standing water.
Also consider convenience. A DIY Raised Garden Bed placed near your kitchen door is more likely to be harvested often, which keeps plants productive and prevents waste.
Selecting Durable Materials
Not all wood is created equal. If your goal is a bed that truly lasts, choose naturally rot-resistant lumber such as cedar or redwood. Cedar is a favorite for good reason. It resists insects and moisture while aging gracefully to a soft silver tone.
Avoid pressure-treated lumber for edible gardens unless you are certain it meets current safety standards. Modern treated wood is safer than older versions, but many home gardeners still prefer untreated cedar for peace of mind.
For hardware, use exterior-grade screws or galvanized bolts. Stainless steel fasteners are even better if your budget allows. The small upgrade pays dividends over time.
Deciding on Size and Depth
A common and practical size for a DIY Raised Garden Bed is four feet wide. This allows you to reach the center from either side without stepping into the soil. Length can vary based on space, but eight feet is a classic, manageable option.
As for depth, aim for at least 10 to 12 inches for vegetables. If you plan to grow root crops such as carrots or potatoes, 16 to 18 inches gives you more flexibility.
How to Build a DIY Raised Garden Bed Step by Step
With planning complete, it is time for the satisfying part.
Tools and Materials You Will Need
- Cedar boards cut to your chosen dimensions
- Exterior-grade screws or galvanized bolts
- Drill with appropriate bit
- Level
- Measuring tape
- Landscape fabric
- Staple gun
- Shovel
If you are comfortable with basic power tools, this project is entirely approachable in a single weekend.
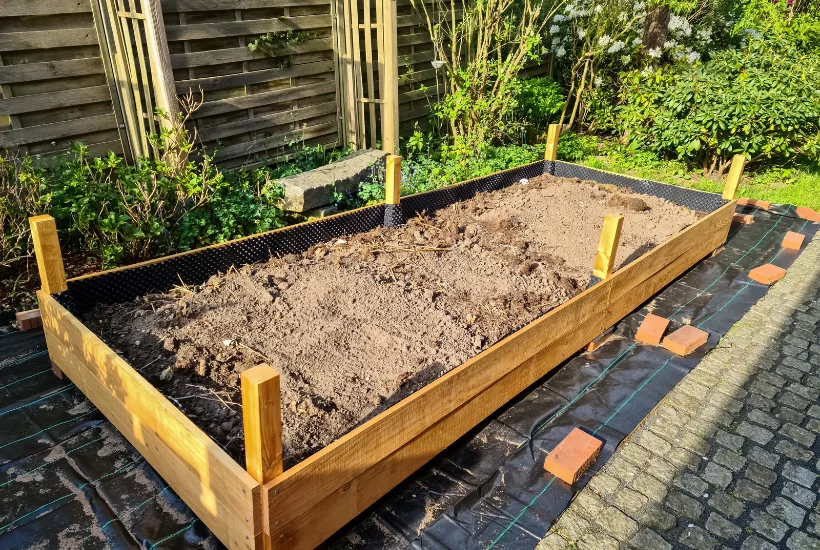
Step 1: Assemble the Frame
Lay your boards on a flat surface and position them into a rectangle. Pre-drill holes to prevent splitting, then secure the corners with two or three screws per joint.
For added durability, consider using corner posts inside the frame. Cut four pieces of sturdy wood to the height of your bed and fasten the boards into these posts. This reinforces the structure and keeps corners tight over time.
Step 2: Prepare the Ground
Clear grass and debris from the area where the bed will sit. You can dig down a few inches to level the ground, but do not overcomplicate this step.
Place the assembled frame in position and use a level to ensure it sits evenly. Adjust soil beneath as needed until the bed feels stable and square.
Step 3: Add a Barrier
Line the bottom with landscape fabric to deter weeds while allowing drainage. Secure the fabric to the interior sides with a staple gun. If you struggle with burrowing pests, you can add a layer of hardware cloth beneath the fabric for extra protection.
Step 4: Fill with Quality Soil
A thriving DIY Raised Garden Bed depends on what goes inside. Fill with a mix of high-quality garden soil, compost, and organic matter. A common blend is 60 percent topsoil, 30 percent compost, and 10 percent aerating materials such as perlite or coarse sand.
Water thoroughly to help the soil settle before planting.
Design Touches That Elevate the Look
A DIY Raised Garden Bed can be practical and beautiful at the same time.
Cap the Edges
Adding a flat cap board along the top edge creates a polished finish. It also provides a comfortable place to sit while tending plants and helps protect the upper edges from weather exposure.
Coordinate With Your Home
If your house features dark window trim or a painted fence, consider staining your cedar to complement those tones. A cohesive palette makes your garden feel intentional rather than improvised.
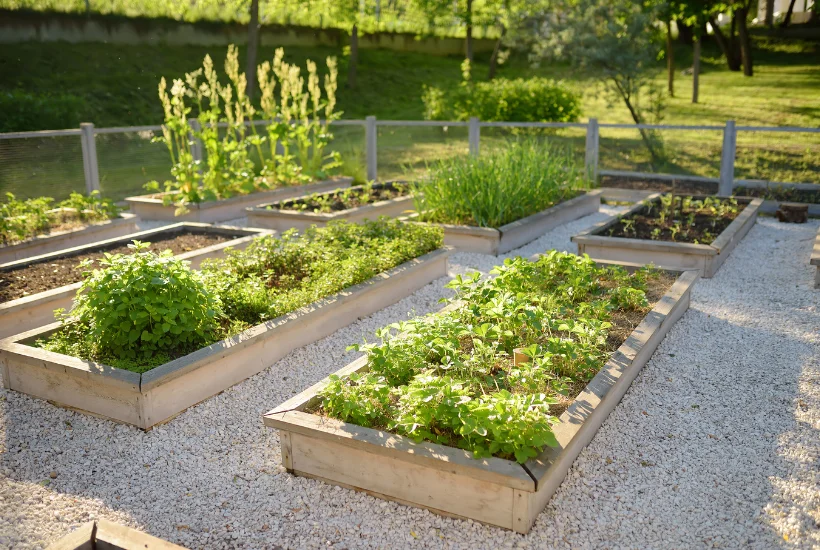
Create Pathways
Gravel, stepping stones, or mulch pathways around your beds keep shoes clean and visually frame the planting area. This simple addition can transform a cluster of beds into a true garden room.
Maintaining Your DIY Raised Garden Bed for Years to Come
Building it well is only half the story. Smart maintenance ensures your DIY Raised Garden Bed remains sturdy and productive.
Protect the Wood
Although cedar is naturally resilient, applying a food-safe exterior wood sealant can extend its lifespan. Reapply every couple of years, especially in wetter climates.
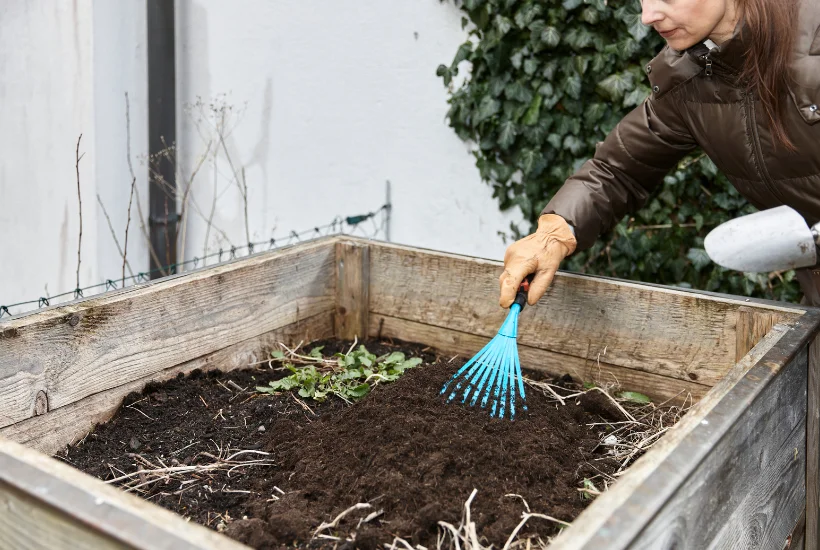
Refresh the Soil Annually
Each growing season depletes nutrients. Add a layer of compost every spring and gently mix it into the top few inches of soil. This keeps plants vigorous without needing heavy chemical fertilizers.
Monitor Drainage
Over time, soil may compact. If water pools after heavy rain, gently aerate the surface with a garden fork. Proper drainage is essential for both plant health and wood longevity.
Common Mistakes to Avoid
Even experienced home gardeners make missteps. Fortunately, most are easy to prevent.
Building Too Wide
If you cannot comfortably reach the center, maintenance becomes awkward and soil structure suffers. Keep width manageable.
Skimping on Hardware
Cheap screws corrode quickly outdoors. Invest in quality fasteners from the start to avoid loose corners and structural issues later.
Ignoring Sun Patterns
A beautifully built DIY Raised Garden Bed in full shade will disappoint if you intended to grow tomatoes or peppers. Study your light conditions before committing.
The Long View
A thoughtfully constructed DIY Raised Garden Bed becomes part of your home’s story. It is where children learn that carrots grow underground. It is where summer evenings end with a handful of cherry tomatoes and a quiet sense of pride.
When you choose durable materials, plan carefully, and maintain your bed season after season, you create more than a growing space. You create continuity. You invest in rhythms that return each spring with greater abundance.
If you have been waiting for the right project to bring your outdoor space to life, consider this your nudge. Sketch your layout. Visit the lumber yard. Commit to one well-built DIY Raised Garden Bed and watch how it transforms not just your garden, but your daily experience of home.
Related posts:
How to Use "Color Capping" to Hide Architectural Flaws
Upgrade Your Living: Smart House and Garage Trends
Garage Door Buying Guide: Key Features, Materials, and Costs
Transforming Your Home: Essential Tips for Garage Renovation
15 Creative DIY Vintage Upcycle Ideas
Smart Garage Doors: Transforming Home Security in San Diego

- The Joy of Adding Personality to the Spaces and Things You Own - February 23, 2026
- How to Build a DIY Raised Garden Bed That Will Last - February 20, 2026
- Free Fun Heated Rivalry Word Search Printables - February 20, 2026

Leave a Reply