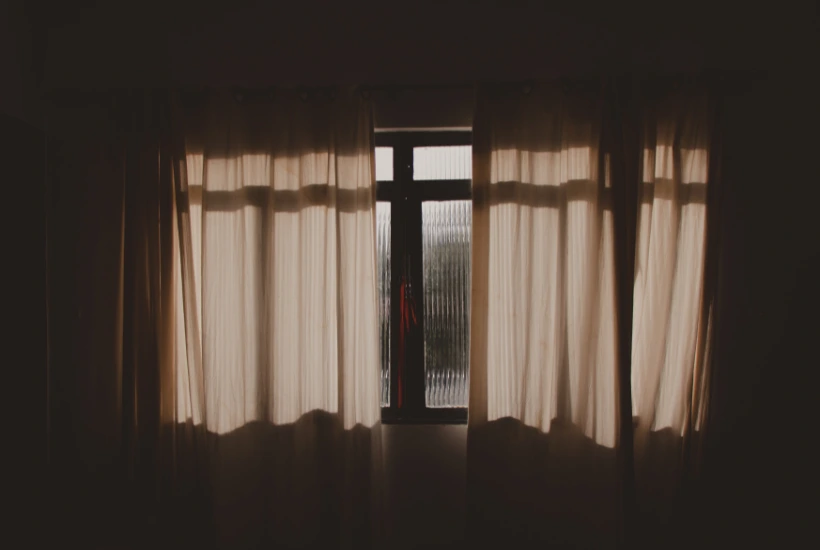
You bought blackout curtains. You hung them. And every morning, a bright halo of light still glows around the top and sides of your window. Frustrating, right?
Here’s the truth: We’ve learned after fitting hundreds of windows that the fabric is rarely the problem. The gaps are. Light sneaks through three weak points: the strip above the curtain rod, the vertical gaps where the fabric floats away from the wall, and the seam where two panels meet.
The good news? You can seal every one of these gaps. Some fixes cost less than $10 and take five minutes. Others are permanent upgrades that make your window look custom-made. Below are 10 methods Lush Loom tested, ranked from quick DIY tricks to full hardware solutions, plus a decision guide so you fix the right gap first.
Why Light Leaks From The Top And Sides Of Curtains
Before you spend money, diagnose the leak. Close your blackout curtains Dubai at midday and stand inside the room. Look for these three patterns:
- A bright strip above the curtain. Your rod sits too low, or it projects too far from the wall. Light bounces off the rod and spills into the room.
- Glowing vertical lines on the sides. Your curtains end at the window frame instead of extending past it. Or the fabric edge hangs forward, creating a “light tunnel” between the curtain and the wall.
- A thin line in the center. Your two panels meet edge-to-edge but don’t overlap.
Most windows leak in two or three spots at once. Match each leak to the methods below, and you’ll get true blackout – not “mostly dark”.
Experience Different Methods To Fix Gap
| Method | Blocks Top | Blocks Sides | Cost | Renter-Friendly |
| 1. Wrap-around (return) rod | Partial | Yes | $25–$60 | No (drilling) |
| 2. Raise and extend the rod | Yes | Yes | $20–$50 | No (drilling) |
| 3. Pelmet box or cornice | Yes | Partial | $30–$150 | No |
| 4. Fabric valance | Yes | No | $15–$50 | Sometimes |
| 5. Magnetic strips or Velcro | No | Yes | $8–$20 | Yes |
| 6. Extra-wide panels (2–2.5x fullness) | No | Yes | $30–$100 | Yes |
| 7. Layer with blackout blinds or shades | Yes | Yes | $30–$120 | Sometimes |
| 8. Blackout liners | Partial | Partial | $20–$60 | Yes |
| 9. Blackout window film | Yes | Yes | $10–$30 | Yes |
| 10. Hook-and-eye curtain returns | No | Yes | $2–$5 | Sometimes |
10 Tested Methods To Block Light From The Top & Sides Of Curtains
1. Install A Wrap-Around (Return) Curtain Rod
A wrap-around rod – also called a return rod or French return rod – curves back toward the wall at both ends. Your curtain slides around the curve and touches the wall. That kills the side “light tunnel” completely.
How to do it:
- Measure your window width and add at least 6 inches per side.
- Buy a U-shaped return rod in that size. Most hardware stores and Amazon carry them.
- Mount the brackets so the rod sits 4–8 inches above the window frame.
- Hang the curtains and slide the end of each panel around the curve until the fabric presses against the wall.
Real result: On a west-facing bedroom window we fitted, a return rod alone cut the visible side glow to zero. The top still leaked, so we paired it with method 3.
Best for: Anyone replacing hardware anyway. It’s the single most effective side-gap fix.
2. Raise The Rod And Extend It Past The Frame
Most people mount curtain rods 2 inches above the window and end them right at the frame edge. That placement guarantees leaks. Professional curtain installers follow a different rule:
- Height: Mount the rod at least 6–8 inches above the window trim. For serious blackout, go halfway to the ceiling or higher. The higher the rod, the harder it is for light to angle over the top into your sightline.
- Width: Extend the rod 8–10 inches past the frame on each side. Your curtain then overlaps the wall, not just the glass.
How to do it:
- Remove the old brackets and fill the holes with spackle.
- Mark new bracket positions 6–8 inches above the trim and 8–10 inches out from each side.
- Use wall anchors rated for your curtain weight. Blackout panels are heavy – cheap anchors sag and reopen the top gap.
- Rehang and check the overlap at midday.
Bonus: High-and-wide mounting makes your window look larger and your ceiling look taller. Designers use this trick even when light control isn’t the goal.
3. Add A Pelmet Box Or Cornice Above The Rod
A pelmet box (also called a cornice board) is a three-sided box that caps the top of your curtain rod. It physically blocks the gap between the rod and the wall, so light can’t spill over the top. Of every method on this list, this one blocks top light most completely.
How to build a simple DIY pelmet:
- Cut a front board the width of your rod plus 2 inches, and about 8–12 inches tall. Foam board works for light use; plywood lasts longer.
- Cut two side panels deep enough to clear the rod by 1–2 inches.
- Join the pieces into a U-shape with wood glue or L-brackets.
- Wrap the box in blackout fabric or batting and staple it on the back.
- Mount it to the wall with L-brackets so it hides the rod completely.
Style tip: Paint the cornice the same color as your ceiling. It reads as architecture, not an add-on, and gives a seamless built-in look that interior designers favor over boxy pelmets.
Best for: Bedrooms, nurseries, and media rooms where you want maximum top-gap blocking with a finished, high-end look.
4. Hang A Valance Over The Curtain Top
A valance is a short fabric layer that hangs across the top of your window, in front of the curtain header. It works like a soft pelmet: light that would escape over the rod hits the valance instead.
Two things make or break a valance for blackout:
- Fabric weight. A sheer or thin cotton valance decorates but doesn’t block. Choose a lined or blackout-weight fabric.
- Overlap. The valance must drop at least 4–6 inches below the top edge of your curtains and extend past both rod ends. A valance that stops level with the header leaves the leak wide open.
Quick renter hack: Mount a valance on a tension rod or a second removable bracket. You get the top coverage without new holes in the wall.
5. Seal The Side Gaps With Magnetic Strips Or Velcro
This is the cheapest, fastest side-gap fix – and the best option for renters. You stick one strip to the wall or window frame and the matching strip to the back edge of the curtain. Press the curtain against the wall at night, and the gap disappears. Peel it open in the morning.
How to do it:
- Buy adhesive-backed magnetic tape or heavy-duty Velcro (about $8–$15 a roll).
- Close your curtains and mark where the outer edge naturally falls against the wall.
- Stick one strip vertically on the wall along that line, from the top of the window to the sill.
- Stick the matching strip to the back edge of the curtain panel.
- Press together each night.
From experience: Magnetic tape holds light and midweight fabrics well. For heavy velvet or triple-weave blackout panels, use industrial Velcro instead – magnets lose grip on thick, stiff fabric. Also, sew-on strips outlast adhesive ones on the fabric side, because curtain fabric flexes and peels adhesive over time.
Cost: Under $20. Time: 15 minutes.
6. Use Extra-Wide Panels For 2–2.5x Fullness
Curtains that match your window’s exact width will always leak. When you close flat, stretched panels, the edges pull away from the wall and the center barely meets. The fix is fullness.
The rule: Your total curtain width should equal 2 to 2.5 times the width of your rod. For a 60-inch rod, buy panels totaling 120–150 inches.
Fullness does three jobs at once:
- The deep folds press the outer edges back toward the wall, shrinking side gaps.
- The two panels overlap generously in the center, closing the middle seam.
- The extra fabric layers double up in the folds, so even thinner fabric blocks more light.
Center-gap trick: If your panels still part in the middle, pin them together at night with a curtain magnet or a simple safety pin placed low, where it won’t show. Some rods also come with a built-in center overlap arm.
7. Layer Curtains With Blackout Blinds Or Shades
One window treatment always leaks somewhere. Two treatments cover each other’s weak spots. This layering approach is what designers recommend most often for true blackout.
How to set it up:
- Mount a blackout roller shade, cellular shade, or blind inside the window frame, as close to the glass as possible. This blocks light at the source.
- Hang your curtains outside the frame – high and wide, per method 2. The curtains catch the halo of light that leaks around the shade’s edges.
Why it works so well: The shade’s leak points (thin edge gaps inside the frame) sit behind the curtain’s coverage zone. The curtain’s leak points (top and sides) sit in front of the shade’s coverage zone. Each layer cancels the other’s gaps.
Bonus flexibility: You also gain light options. Shade down, curtains open = dim daylight. Both closed = movie-theater dark. Cellular shades add insulation too, which lowers heating and cooling costs.
8. Add Blackout Liners To Your Existing Curtains
Love your current curtains but hate the glow that passes through them? Don’t replace them – line them. Blackout liners are plain, light-blocking panels that hook onto the back of your existing curtains or hang from a second rod behind them.
How to do it:
- Measure your curtain panels.
- Buy liners slightly narrower and shorter, so they hide behind the decorative fabric.
- Attach them using the liner’s hooks on your curtain’s rings, or hang them on the rear rod of a double-rod bracket.
Important: Liners fix light passing through the fabric. They don’t fix gaps around it. Pair liners with a return rod (method 1) or magnetic strips (method 5) for full coverage.
9. Apply Blackout Window Film Directly To The Glass
Window film blocks light at the glass itself, before it ever reaches your curtains. Static-cling blackout film costs $10–$30, cuts with scissors, and peels off cleanly – which makes it a favorite for renters, night-shift workers, and RV owners.
How to apply it:
- Clean the glass thoroughly. Dust causes bubbles.
- Cut the film about half an inch larger than the pane, then trim to fit.
- Spray the glass lightly with soapy water.
- Press the film on and squeegee bubbles out from the center.
Know the trade-off: True blackout film blocks your view and all daylight, all the time. Use it on windows you never look through – or choose a one-way privacy film if you want daytime light with reduced glare instead of total darkness. For most bedrooms, film works best on the glass plus curtains over it, since film can’t cover the frame edges.
10. Create Curtain Returns With A Hook And Eye
This is the pro installer’s secret, and it costs about $3. A “return” is the section of curtain that turns the corner and touches the wall. You can create one on a standard straight rod – no return rod needed.
How to do it:
- Screw a small screw-eye (a “hook and eye” bolt) into the wall just below each end of your rod, at the point where the last pleat or grommet falls.
- When you hang the curtain, feed the last hook – or a safety pin through the last grommet corner – into the eye.
- The curtain edge now pulls back and pins flat against the wall on both sides.
Result: The same wall-hugging seal as a wrap-around rod, for the price of two screws. Workrooms and custom drapery makers do this on nearly every installation because it also makes curtains look tailored and intentional.
Which Method Should You Choose? A Quick Decision Guide
- Renting, small budget: Magnetic strips (5) + a tension-rod valance (4) + window film (9). Total under $50, zero drilling.
- Own your home, want it done once: Raise and extend the rod (2) + return rod or hook-and-eye returns (1 or 10) + a cornice (3).
- Light passes through the fabric itself: Blackout liners (8) or new panels at 2–2.5x fullness (6).
- Need pitch-black for day sleeping or a media room: Layer blackout shades with curtains (7), then seal the remaining edges with methods 5 and 10. This combination gets closest to 100% darkness.
- Baby nursery: Layered shades and curtains (7) plus a cornice (3). Avoid adhesive strips low on the wall where little hands can reach.
Why Full Darkness Is Worth The Effort
Sealing curtain gaps isn’t just about looks. A properly darkened room pays off in real ways:
- Deeper sleep. Even small light leaks at night can suppress melatonin, the hormone that controls your sleep cycle. Night-shift workers and light-sensitive sleepers feel this most.
- Lower energy bills. The same gaps that leak light also leak heat. Sealed, layered window treatments insulate against summer sun and winter drafts.
- Better privacy. Gaps that let light in also let silhouettes show out at night.
- Protected furnishings. Direct sun fades fabric, rugs, and wood. Blocking it extends their life.
- A real home theater. Screen glare disappears, and blacks on your TV actually look black.
Common Mistakes That Keep Letting Light In
- Buying curtains the same width as the window. You need 2–2.5x the rod width for fullness and overlap.
- Mounting the rod at the frame. Go 6–8 inches higher and 8–10 inches wider per side.
- Trusting “blackout” labels alone. Blackout fabric stops light through the material. It does nothing about gaps around it.
- Choosing grommet curtains for blackout rooms. The metal rings create small openings along the header. Pinch pleat or pencil pleat headers seal the top far better.
- Stopping curtains at the sill. Light bounces in underneath. Floor-length panels that lightly graze the floor close the bottom leak.
- Using weak wall anchors. Heavy blackout panels pull rods away from the wall over time, reopening the top gap.
Frequently Asked Questions
1- Why is my room still bright with blackout curtains?
The fabric blocks light, but the gaps around it don’t. Light leaks over the top of the rod, around the sides where the curtain floats off the wall, and through the center seam. Seal the gaps with a cornice or valance on top, returns or magnetic strips on the sides, and generous panel overlap in the middle.
2- How do we block light from the top of curtains without drilling?
Use a tension-rod valance inside or just above the window frame, apply blackout window film to the glass, or mount a foam-board pelmet with heavy-duty removable adhesive strips. All three block top light and leave no holes when you move out.
3- What is the cheapest way to block light from the sides of curtains?
Adhesive magnetic tape or Velcro strips, at $8–$20 a roll. Stick one side to the wall and the other to the curtain’s back edge, then press them together at night. A hook-and-eye return costs even less – about $3 – if you don’t mind two small screws.
4- How high should we hang curtains to stop light from the top?
Mount the rod at least 6–8 inches above the window trim. For near-total blackout, mount it halfway between the trim and the ceiling, or add a cornice. Higher mounting steepens the angle light must travel, so less of it reaches your eyes.
5- Do wrap-around curtain rods really block side light?
Yes. The curved ends let the curtain fabric bend back and touch the wall, closing the vertical gap where most side light enters. Pair a return rod with panels at 2–2.5x fullness and the side leak disappears almost entirely.
6- What curtain heading style blocks the most light?
Pinch pleat and pencil pleat headers block best because the fabric runs continuous across the top. Grommet and tab-top styles leave small openings at each ring or tab where light sneaks through.
7- Can we get 100% darkness with curtains alone?
You can get very close, but layering wins. Combine an inside-mounted blackout shade with high-and-wide curtains, then seal the curtain edges with returns or magnetic strips. The shade blocks light at the glass, and the curtain catches whatever escapes around the shade’s edges.
8- How do we stop light coming through the middle where my curtains meet?
Add fullness first – panels totaling 2–2.5x your rod width overlap naturally in the center. If a sliver remains, clip the panels together at night with a curtain magnet or a low, hidden safety pin, or use a rod with a built-in center overlap arm.
Final Takeaway
Total darkness comes from a simple formula: block light at the glass, cover generously past the frame, and seal every edge. Start with the leak that bothers you most. A $10 roll of magnetic tape fixes the sides tonight. A raised, extended rod and a cornice fix the top for good. Stack two or three of these methods, and the morning halo around your curtains disappears – and so does your 5 a.m. wake-up call.
Related posts:
How to Create a Home Gym in Your Garage: A Complete Guide
25+ Mind-Blowing DIY Minimalist Decor Hacks You Need Now!
Naturally Inspired: 10+ Biophilic Home Decor Ideas
Living on the Edge: How Modern Families Rethink Shelter and Security
Transform Your Garage into a High-Value Living Space Today
25+ DIY St. Patrick's Day Decorations in

- 3 Best Furniture Brands for Modern and Minimalist Interiors - October 14, 2026
- How to build a backyard pool space that actually fits your daily life - October 13, 2026
- Garden room cladding: what survives a British winter - October 13, 2026

Leave a Reply