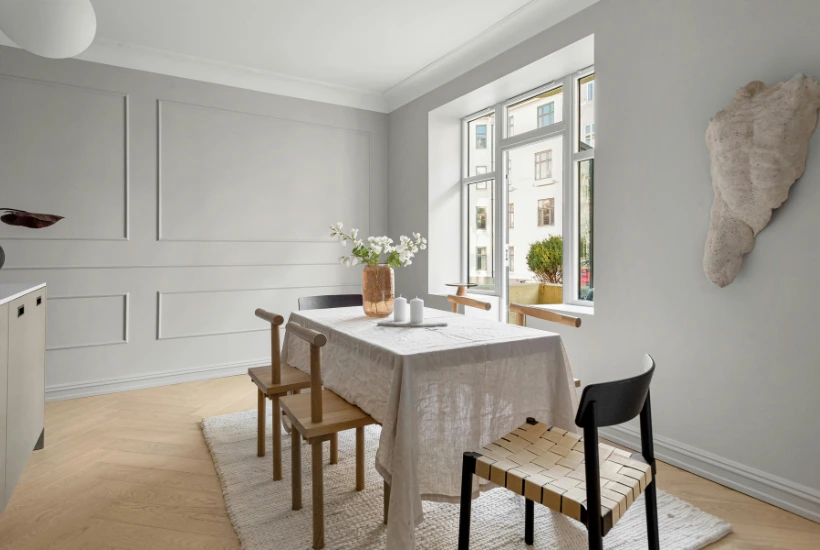
Slow-Living Weekend Build: The Sideboard I Made for Our Dining Nook
Our dining nook had a problem. Not a dramatic one. Just a sad stretch of wall where a radiator used to be, collecting stray mail, a fruit bowl nobody emptied, and a tangle of phone chargers. For about fourteen months I said I’d “do something with it.” Then one rainy Friday in March I finally measured the gap: 52 inches wide, 15 inches of usable depth before the chair backs started complaining.
That weekend I built a sideboard. Two days, one borrowed track saw, and roughly $180 in materials. Here’s how it went, including the parts I’d do differently.
Why a Sideboard, and Why Build It Myself
I priced out ready-made options first, because I’m not a masochist. Anything under $400 looked like it would sag by Christmas. Anything that felt solid started around $900 and came in one of three finishes, none of which matched our oak floors.
Building it myself wasn’t about saving money, though I did. It was about the pace. There’s something about a project that takes two unhurried days instead of twenty frantic minutes of flat-pack assembly. You sand a corner. You make coffee. You come back and sand it again because you noticed a flat spot.
My wife calls this “slow living.” I call it “being bad at finishing things quickly.” Same result.
Setting the Constraints First
Before touching any material, I wrote three rules on the back of an envelope:
Height: 32 inches. Tall enough to work as a serving surface, short enough not to crowd the window.
No doors. Open shelving with baskets. Doors mean hinges, hinges mean alignment, alignment means a Sunday evening tantrum.
One species, one finish. Mixing woods is how beginner projects start looking like ransom notes.
Those three limits probably saved me six hours.
Choosing the Material (The Part That Actually Matters)
I’d originally planned to glue up solid oak boards. Then I did the math on a 52-inch panel and the lumber cost alone crossed $300. More importantly, I’d have needed a jointer I don’t own and a flat assembly table I definitely don’t own.
So I went with engineered panels instead. Specifically, I ordered a furniture grade board in oak veneer and had it cut to size before it ever reached my garage. This is the single best decision I made all weekend. The panels arrived square, flat, and already edged, which meant my first task on Saturday morning was assembly, not an hour of nervous ripping with a circular saw and a bent straightedge.
For anyone who hasn’t used it: furniture board is a stable core wrapped in real wood veneer. It won’t cup when your kitchen humidity swings in February. It takes screws reasonably well if you pre-drill. And the finished edges look genuinely good once you’ve oiled them.
My Cut List
2 sides at 32″ x 15″
1 top at 52″ x 15.5″
2 fixed shelves at 50.5″ x 14.5″
1 center divider at 28″ x 14.5″
1 back panel in 6mm ply, 52″ x 30″
That’s it. Six pieces of furniture board and a cheap plywood back. Total material cost landed at $181 including the oil finish.
The Build: Saturday and Sunday
Saturday started at 8am with coffee and a stack of panels leaning against the workbench. I used dominos for the main joints, but dowels or pocket screws work just as well if you’re not precious about it. The center divider went in first, then the shelves, then the sides, then the top.
By 2pm the carcass was clamped and drying. I spent the rest of the afternoon doing nothing useful. That’s the slow-living part.
Sunday was sanding and finishing. I worked up through 120, 180, and 220 grit, then wiped on three coats of hardwax oil with about ninety minutes between coats. The veneer drank the first coat fast. The second evened everything out. The third was arguably unnecessary but I was enjoying myself.
What I’d Change
Two things. First, I’d have made the lower shelf adjustable. Our storage baskets are 11 inches tall and the fixed gap is 13 inches, which wastes two inches across the whole width. Annoying forever.
Second, I should have ordered an extra 4 inches on the top panel for an overhang. A flush top looks tidy in photos but it’s harder to wipe crumbs off.
Six Months Later
The sideboard holds table linens, two serving platters, a record player that gets used maybe monthly, and the charger chaos is now contained in a lidded box. The oil finish has darkened slightly, which I like.
Nobody has asked where we bought it. Everyone has asked who made it. That’s the whole reward, honestly.
If you’ve got an awkward wall and a free weekend, measure it this week. Order the panels cut to size. The rest is just glue, patience, and a bit of sandpaper.
Related posts:

- Why Dispensary Location Matters More Than You Think in Sarasota - October 8, 2026
- Slow-Living Weekend Build: The Sideboard I Made for Our Dining Nook - October 8, 2026
- Creative Projects for Journal Lovers Who Say They Can’t Draw - October 7, 2026
Leave a Reply