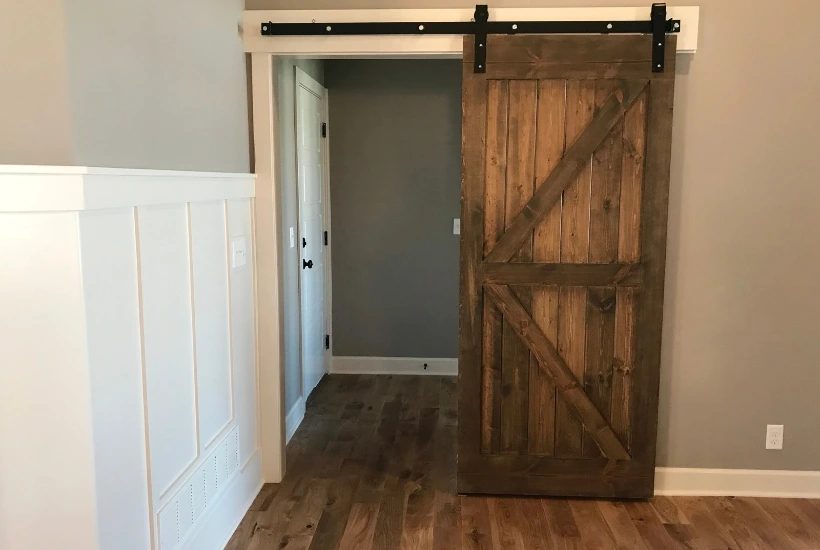
A lot of the emails I get at the store are from people who built their own barn door and now need hardware for it. I’m all for it. I always mention to customers that it usually is easier to find doors locally since a large portion of the cost is shipping extreme length and weight doors, and building your own is about as local as it gets.
The catch is a homemade door doesn’t come with any specs. So here’s what I’d ask you for if you emailed me:
1) Width and height of the opening
2) Height to the top of the trim (if there is trim)
3) Door weight
4) Door thickness where the hangers bolt on
5) Space between the top of the door and the ceiling
6) Open wall next to the opening
7) Where the studs are
With those I can usually tell you which barn door track kit works in a couple minutes, since every kit has a weight rating, a thickness range and a minimum clearance above the door. I own a barn door hardware store so the ratings I give below are for the hardware we sell. Other brands rate things differently.
-
How big should the door be?
Last year a customer building his own door asked me if he should make it as wide as the trim and as tall as the upper trim rail or add anything to the sides and top. It’s your choice but I usually recommend just making the door as wide as the trim and as tall as the upper trim. You can go more, but it’s not necessary.
No trim? 4in wider than the opening is recommended, 6in if you want extra privacy. That’s 2in or 3in of overlap on each side.
Height is the opening plus at least 1in. Our kits leave a 3/8in gap at the floor and the extra inch covers the top. If you have trim across the top, the door needs to reach the top of that trim because the track mounts above the door and you never want the track on the trim. Taller is fine.
The example I’ll use for the rest of this: a bedroom doorway 32in wide x 80in tall, with the top of the casing at 84in. That’s a 38in wide door (32 + 6) that’s at least 84in tall.
-
How much does your door weigh?
Most people already know this by the time they email me. If you built the door you’ve probably weighed it, and if you bought a slab the weight is usually on the listing.
Say our bedroom door comes in at 96lbs. Here’s what our standard duty kits are rated for:
– Straight top mount: 75lbs
– J top mount and flat top mount: 100lbs
– Straight strap: 125lbs
– J-strap: 200lbs
– Horseshoe: 250lbs
Technically any kit that handles 100lbs can hold that door. But please consider the weight of the total door after adding handles, decorative pieces, etc. The straight top mount is out either way.
What about a top mount so you don’t see straps on the face? Yes, that technically falls under the weight limit. But again, consider the total weight of the door. If you want some room for error, consider using an additional roller or consider the hidden roller setup (hidden roller sizes off the rough opening, so check its instructions). Our ratings are per roller, so a third roller adds half again. A 200lb J-strap becomes 300lbs (extra rollers are usually quoted separately).
For a heavier door, say 230lbs, it depends what you prefer. Would you prefer 2 hangers with louder wheels or 3 hangers with quieter wheels? The louder option is heavy duty sliding door hardware, where any of our strap rollers hold a minimum of 400lbs with the standard steel wheels. The quieter option is a standard duty J-strap with a third roller, which gets you to 300lbs on Delrin wheels. If you put Delrin wheels on heavy duty instead, the J-strap drops to 200lbs per door.
On our kits a door between 48in and 60in wide can take a third hanger, and over 60in it needs one.
-
How thick is the door where the hangers go?
Door thickness is one of the first things I ask about. If it’s between 1-3/8 and 1-3/4in thick, the most cost effective option is any of our standard duty products. If it’s thicker than 1-3/4in, then you’ll want to look at our heavy duty products, which go up to 2-1/4in.
Board and batten doors are the tricky ones. 3/4in boards with 3/4in battens means you’re 1-1/2in at a batten but only 3/4in between them. The hangers need to be attached to a flat, structural face that is capable of holding the weight of the door. Some customers do inset the hangers but understand that this will move the door further from the wall.
How tall does the top rail need to be? A customer building his own door asked me that last year because he didn’t want the U-shaped bracket hanging below it. It depends on which product you’re looking at. On our standard duty horseshoe the bracket goes down 4-3/4in on the face of the door, and on the heavy duty horseshoe it goes down 5-5/8in. Hold the actual hanger up to the door before you fasten the rail.
Yes, some customers have used a single sheet of 3/4in plywood for a barn door. Because of the thickness, I recommend looking at our cabinet kits to hang those doors. Just check the kit’s thickness range and weight rating against your door. Old door slabs are easier since most interior doors are 1-3/8in.
Thickness also matters for trim. Say your casing sticks out 3/4in. For a hidden roller setup, it will clear. However all our other kits are designed to sit 3/8in off the wall, so make sure the kit you’re buying includes enough additional spacers to clear 3/4in of trim, or add a trim clearance kit (heavy duty and stainless steel setups). The spacers in our standard duty kits clear up to 1in of trim with a 1-3/8in door and up to 1/2in with a 1-3/4in door, so with a 1-1/2in door check the spacer table. Heavy duty extension kits go up to 1-1/4in. Above that, I would start worrying about the moment on the drywall.
-
How long does the track need to be?
Track lengths are dependent on door widths, not the opening. First decide the door width you want. For a 36in opening, 40in is recommended, or 42in for extra privacy. Once you decide on the door width, double the width to determine the track length you need. So our 38in door gets a 76in track.
Once you determine the track length, make sure you have an entire door’s width of clear wall next to the opening. Nothing should stick out more than 3/8in (e.g. thermostats, light switches, etc). If it’s less than 3/8in, understand that you won’t have access to it when the door is open (e.g. outlets). In our example the far edge of the open door ends up 3 + 38 = 41in past the opening, since it also overlaps the opening by 3in.
A couple weeks ago a customer had a doorway right up against an exterior wall, so the door could only open one way, and there was a light switch about 7in from the opening that stuck out 3/4in. Our kits hold the door 3/8in off the wall, so the door would hit the switch every time it opened. Swapping to a low profile rocker or flat smart switch was the simpler fix, plus a longer track so the door could slide all the way past it.
Just keep in mind tracks longer than 7ft 6in will be shipped in multiple pieces, and the header board or blocking needs to run continuously across the joint.
We can do custom lengths, but they can’t be returned. If you cut steel track yourself, put rust inhibitor on the cut edge only (never where the wheels roll), and know it voids our warranty.
-
How high does the track go, and will your ceiling allow it?
Track height is measured from the floor to the centerline of the track. On our standard duty kits it’s the door height plus 1-1/2in, and on heavy duty it’s door height plus 1-3/4in. Both of those already account for the 3/8in floor gap so you don’t add it again. Our 84in door on standard duty puts the track centerline at 84 + 1-1/2 = 85-1/2in.
Each hanger also needs a minimum amount of room between the top of the door and the ceiling. A customer asked me this spring how much she needed. On the kit she was looking at the hardware sits 5-1/8in above the door, but you want to make sure you have 5-1/2in above the door to install the door with the hardware. On our kits:
– Standard duty straight strap, straight top mount and horseshoe: 4in
– Standard duty J-strap and J top mount: 4-1/2in
– Heavy duty J-strap, flat top strap, top mounts and horseshoe: 5-1/2in
– Wagon wheel hangers: 9in
The top of our door is at 84 + 3/8 = 84-3/8in. With an 8ft ceiling (96in) that leaves 96 – 84-3/8 = 11-5/8in, so every style fits.
Measure from the finished floor at the spot the door will hang. Last month a customer installing a pair of poplar doors measured, and then the homeowners added crown molding and replaced the carpet with laminate, so he had to go back out and remeasure everything. The number that mattered was from the new floor to the bottom of the crown, not the ceiling. Sloped ceilings are the same way. Another customer this month has a closet over a garage with a sloped ceiling, and her measurement has to be taken at the low end of the track.
-
Why do you need a header board?
We recommend at least a 1×6 hardwood header board to mount the lag bolts to. Drywall can’t hold a barn door, and the holes in the track almost never line up with your studs. You should use lag bolts to tie the header to the studs and then use lag bolts (provided in the kit you order) to tie the track to the header. The lag bolts we recommend for the header board are 3/8in x 3in. My recommendation is to try to connect to every stud in the span. But at the least, try to connect every 16in.
Header boards must be hardwood. Oak, maple or poplar all work. You just want to stay away from MDF or even softwoods for the header. Last month a customer asked if the primed finger joint 1×6 he bought at a big box store would work. Primed finger joint board is almost always pine and would be too soft for a header board. I told him to swap it for poplar. The same store carries it in the hardwood aisle.
Last year I had someone ask about a 1×10. 1×10 would be overkill. My recommendation is a 1in x 6in hardwood header and only go wider if you like the look.
The other option is solid wood blocking between the studs, put in before the drywall goes up and running the full length of the track. If your studs are steel, blocking is what you’d use since lag bolts won’t hold in steel. Either one alone is enough.
Watch the framing header over the doorway too. The closet customer I mentioned figured the header over her opening was enough. The problem is her track goes about 5in past the opening on one side and the header probably doesn’t, and you want solid wood behind every bolt. A header board across the whole track takes care of that.
The header board runs past each end of the track to the next stud. For our 76in track that’s somewhere between a little over 76in and about 110in depending on where the studs are, so find them before you go to the lumberyard. The track lag bolts come with the kit (roughly 3in to 7in across our lineup). Set the board so the whole track lands on it at 85-1/2in. Paint or stain it before you put it up.
-
Which hardware fits your door?
Once weight, thickness and ceiling room are sorted, the roller style is mostly an aesthetic preference. Heavy duty comes with color-matched steel wheels whereas our standard duty kits have Delrin wheels, which are much quieter. Face mounted straps bolt through the door and show on the front. Top mounts attach to the top edge so nothing shows on the face, which is nice if you spent a weekend on a herringbone pattern, but on our kits those are rated 75lbs to 100lbs.
I also recommend a soft close. It prevents the banging at the end of the track, much like the soft close features of cabinets.
A few other things:
– Floor guide: Typically you only need 1 floor guide for each door you’re installing. It attaches just outside the opening, and if it’s installed just outside the finished edge it should be under the door for its full travel. A customer this spring had a house on a solid concrete slab, so the all-in-one wall mounted floor guide was the better fit for her.
– Stops: Floor guides don’t act as door stops. All our door stops mount to the track. I had someone this year using floor guides as stoppers. Yikes.
– Floor gap: our kits leave 3/8in under the door. For a shed door, gravel or a raised threshold, leave more.
– Outdoors: in our lineup stainless steel is the only hardware rated for outdoor use.
– Bathrooms: a barn door can be latched but not deadbolted.
– Closing against a side wall: If the door is closing to a wall 90 degrees to it, then yes, you can have the door butt up to the wall. However, you’ll want to make sure there is no baseboard or trim on the wall that won’t let the door get flush. If you don’t want to remove any baseboard, a small wall would be useful to have. Keep both stops on the track either way.
-
Putting it all together: hanging the bedroom door
We don’t keep a list of installers. This is because we pride ourselves on the simplicity and ease of installing our hardware. Most DIYers who aren’t afraid to pick up a wrench have no problems with the install. Every product has installation instructions on the page, so start there.
For our example (a 32in x 80in bedroom doorway, casing topping out at 84in, an 8ft ceiling and a 96lb door) here’s the order I’d go in:
1) Door: 38in wide, at least 84in tall, 96lbs, standard duty.
2) Track: 76in, with 41in of clear wall past the opening.
3) Track centerline at 85-1/2in, with 11-5/8in above the door.
4) Paint or stain the door and the header board before anything goes on the wall.
5) Cut the header board to reach the first stud past each end of the track and lag it into the studs with 3/8in x 3in lag bolts.
6) Level the track, bolt it to the board with the lag bolts from the kit, then check level again once everything is tight.
7) Bolt the hangers through the top rail.
8) Get someone to help you lift the door on, 96lbs is not a one person lift. Then put in the floor guide and stops.
9) You want 3/8in under the door and no rubbing on the casing or baseboard.
Last thing, don’t lubricate it. The hardware we sell has sealed bearings that run dry, and silicone spray, WD-40 or grease on the track just collects dust and makes the door roll worse. If it starts to feel sluggish, wipe the track channel with a dry cloth and make sure it’s still level.
Evan Christensen is the owner of The Barn Door Hardware Store, a family-owned retailer of barn door, bifold and hidden roller hardware. Before taking over the store in 2024, he worked in hardware engineering and structural simulation.
Related posts:
Naturally Inspired: 10+ Biophilic Home Decor Ideas
Turn Design Mockups Into Videos with Photo to Video AI Maker
Travel Light, Explore More: Unburdening Your Journeys
Why Jamaican Sea Moss Is Central to the Return of Traditional Nutritional Remedies
Small Changes That Can Improve Your Mental Energy and Focus
Where to go for every kind of getaway

- How to Make a Printable Family Health Planner That You’ll Actually Use - November 17, 2026
- 30+ DIY Christmas Gift Baskets To Bring Joy to Your Loved Ones - November 17, 2026
- 20+ Best Vintage Winter Wonderland Decor For A Magical Home - November 17, 2026

Leave a Reply