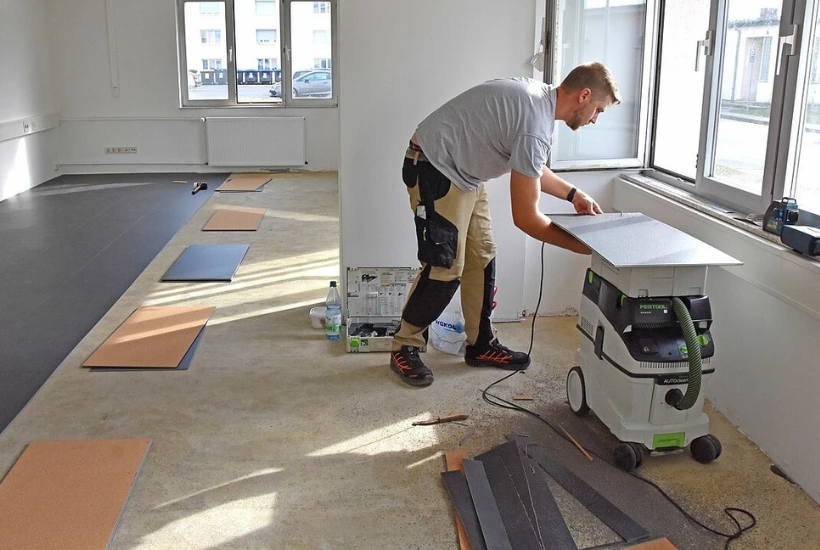
Picture a Saturday in January. The boxes of new flooring spent the week in the garage, the furniture is already in the hallway, and you want the living room finished before dinner. That plan is how a lot of first-timers end up with gaps, peaking joints or planks that click together in the morning and pop apart by spring.
SPC (stone plastic composite) is the friendliest rigid-core vinyl plank a DIYer can pick. The core is mostly limestone powder and PVC, the planks click together, and nothing gets glued or nailed down. Learning how to install SPC flooring is a weekend project. Avoiding the mistakes below takes a bit of planning, especially if you live somewhere with real winters.
1. Opening cold boxes and starting right away
Rigid core moves less than laminate, but it still moves. Manufacturer sheets usually ask for 48 hours of acclimation with the boxes lying flat in the room where they will be installed. One installation guide we read sets that window at 18 to 22°C and tells you to keep the planks in their cartons the whole time. Boxes that sat in a car trunk or an unheated garage in Ottawa or Quebec City need that full wait, sometimes more.
Shopping matters here too. If you buy locally in Quebec, Entrepôt de la Réno sorts its SPC planks by thickness (5.2 mm and 5.5 mm on its rigid-core range), which makes it easy to keep every room on the same profile. Buy about 10% extra for cuts and grab all your cartons from the same production lot, since color matching is only guaranteed within one lot.
2. Trusting a floor that “looks flat”
Click joints fail on humps and dips well before they fail anywhere else. The usual tolerance is 3/16 inch over 10 feet, and some brands ask for 1/8 inch over 4 feet. Lay a 4-foot level or a straight 2×4 across the room and slide a coin under the low spots. Sand the high seams, fill the hollows with a cement-based patch and let it cure fully.
Over concrete, especially a basement slab, roll out 6 mil polyethylene sheeting first and tape the seams. New concrete needs to cure for weeks before any floor goes over it; the guides we read ask for six weeks to 60 days
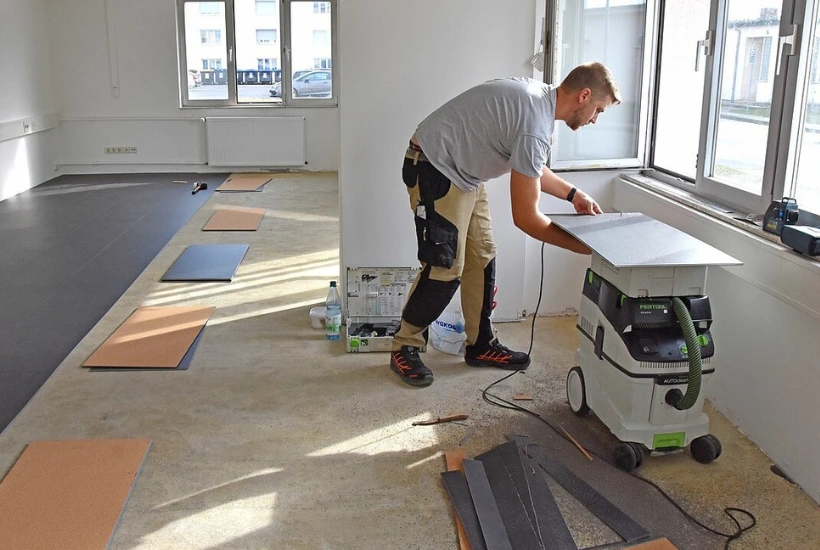
Credit: Emily Jennings, U.S. Army / Public domain (Wikimedia Commons)
3. Doubling up the underlayment
Most SPC vinyl planks ship with a foam or cork pad attached. Adding a second soft layer underneath feels like a comfort upgrade, but it lets the locking edges flex every time someone walks over them, and that is how the lock on each joint breaks. Only add what the manufacturer lists as approved, and on concrete that usually means the vapor barrier alone.
Is a quarter inch really enough?
Yes, as long as you leave it everywhere. Floating floors need an expansion gap of 1/4 inch (some brands say 3/8) at every wall, door frame, pipe and cabinet base. Use spacers on every side, then hide the gap later under baseboard or quarter round. Never pin the floor down with trim nailed through the planks, and do not set kitchen islands on top of it.
Cold-climate homes are where this rule earns its keep. Heating season dries the air out, and Health Canada suggests keeping indoor relative humidity between 30% and 50%. A house that swings from damp July to dry February puts the whole floor through a slow seasonal stretch. The gap gives it room to do that without buckling.
4. Leaving the door casings alone
Door casings are where amateurs lose an hour. Lay a plank face-down on the underlayment, rest a handsaw on it and cut the bottom of the casing so the new floor slides under. It looks far cleaner than scribing around the trim. A jamb saw makes it faster, but a fine-tooth handsaw works.
5. How to install SPC flooring rows without a skinny last one
Measure the room width and divide by the plank width before you click a single row. If the last row comes out thinner than about 2 inches, rip the first row narrower so both edges match. Stagger end joints by at least 8 inches, and keep the shortest offcut no smaller than about twice the plank width. Score and snap with a utility knife for straight cuts, and use a jigsaw for notches.
The click sequence, row by row
Once the prep is done, SPC flooring installation follows the same rhythm in every room. Start in the left corner of the longest wall, with the tongue side of the first plank facing the wall. On that first row, cut off the unsupported tongue so a clean, solid edge sits against the spacers.
- Lay the first plank, then press the short end of the next plank into it at a low angle and fold it down flat. Finish the row, cutting the last plank to length and keeping a spacer at the end wall.
- Start the second row with the offcut from the first row if it is long enough. Angle its long side into the groove of the previous row, push it forward and lay it down so the edge locks.
- Click the short side of each new plank into its neighbor, then tap it along with a tapping block and a rubber mallet until the joint closes with no visible line. Never hit the locking edge directly.
- After two or three rows, check the expansion gap along the starting wall again and adjust the spacers. A crooked first row only gets worse with every row that follows.
- At the last row against the far wall, mark each board with the wall’s contour, keep the 1/4 inch gap, cut, and use the pull bar to close the long joint.
Pipes need their own trick. Drill each hole about 16 mm wider than the pipe so the gap continues around it, cut the plank through the hole, and glue the small piece back in place behind the pipe. A moisture meter is worth borrowing too: one installation sheet asks for a wood subfloor under 12% moisture before any plank goes down.
6. Ignoring the fine print on heat and seasons
Radiant floor heating and SPC get along, with limits. Artisan Hardwood’s SPC sheet caps the floor surface at 89°F (32°C), and other brands set their own number, so check yours before you crank the thermostat. Cottages and three-season rooms are another trap. One manufacturer’s guide accepts them only if the planks are acclimated and installed with the space held between 55°F and 85°F for 72 hours before, during and after the job.
Indoor air quality is the last box to tick. A FloorScore seal on the carton means the product’s emissions were tested against California’s Section 01350 limits, which is reassuring in a basement bedroom with small windows.
Get these right and the rest really is click, tap, repeat. A tapping block, a pull bar, a rubber mallet and a box of spacers will carry you through the job, and the floor will still be tight when the snow melts.
Related posts:
From Abstract Prints to Nature-Inspired Decor: Art Trends for Modern Homes
25+ Best Christmas Wall Decor Ideas for
25+ Amazing DIY Wall Art Ideas To Transform Your Walls
Modern Garage Door Designs That Elevate Your Home’s Exterior
40+ Best Coffee Bar Ideas & Stations For
21 Best Christmas Bathroom Decor Ideas for

- 5 Ways to Reduce No-Shows for Kids’ Trial Classes - October 20, 2026
- 7 Creative Ways to Use Interior Wall Panels to Add Character to a Rental Property - October 20, 2026
- What Are the Signs Your Houston Home May Need Professional Attic Cleaning? - October 20, 2026

Leave a Reply